Redact images
You can redact areas on an image. For example, you may want to anonymize a study by removing patient information. You can choose to apply the redactions to the current image or to all images in the series.
NilRead provides two methods to redact an image.
- You can add masks to cover areas you want to redact.
- You can use shutters to identify the areas you want to retain.
You cannot use both methods on the same image.
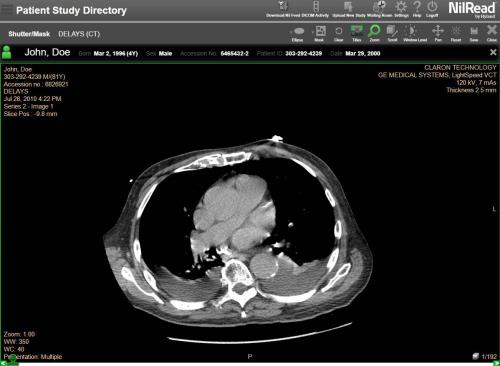
- In the QC viewer, select Shutter/Mask from the toolbar.
- Select a series. You can only select a series containing images eligible for redaction.
If the series contains at least one multiframe instance, the Select Instance window appears, allowing you to choose the instances you want to edit. To edit all instances, select OK. To edit specific instances, deselect the Select All checkbox, click (or tap) the instances you want to edit, then select OK.
- The first image in the series opens.
- Use Scroll or the scroll bar at the bottom of the window to select a different image. You can use standard tools such as titles, zoom, window level, pan, and reset to adjust the image.
- If the study contains multiple series, they are shown in a side panel.
Apply a mask
Use masks to cover areas you want to redact.
- Select Mask from the toolbar.
- Select a shape from the toolbar (Ellipse, Rectangle, Square, Circle).
- Draw shapes over the areas you want to redact. The areas covered by shapes will be blocked out on the image.
- To edit a shape, right-click (or touch and hold) the shape, then select Edit. Change any of the following options, then select Save.
- Shape Type (Rectangle, Square, Ellipse, Circle).
- Color Fill color.
- Border Border color.
- Top, Left Location on the image.
- Width, Height Width and height.
- To resize a shape, drag a corner of the shape.
- To move a shape, drag the shape to a new position.
- To delete a shape, right-click (or touch and hold) the shape, then select Delete.
- To remove all shutters and masks from the image, select Clear.
Apply a shutter
Use shutters to identify the areas you want to retain.
- Select the arrow beside Mask in the toolbar, then select Shutter.
- Select a shape from the toolbar (Ellipse, Rectangle, Square, Circle).
- Draw shapes over the areas you want to retain. Only the areas covered by shapes will be visible; the rest of the image will be redacted.
- To edit a shape, right-click (or touch and hold) the shape, then select Edit. Change any of the following options, then select Save.
- Shape Type (Rectangle, Square, Ellipse, Circle).
- Color Fill color for the redacted area. By default, the redacted area is black. To change the color, edit the color for the first shutter applied to the image. This color will be used for the redacted area. If the first shutter is deleted, the color for the second shutter will be used.
- Top, Left Location on the image.
- Width, Height Width and height.
- To resize a shape, drag a corner of the shape.
- To move a shape, drag the shape to a new position.
- To delete a shape, right-click (or touch and hold) the shape, then select Delete.
- To remove all shutters and masks from the image, select Clear.
Reverse masks and shutters
You can change the masks applied to an image to shutters. You can also change shutters to masks.
- To change the masks on an image to shutters, select Shutter from the toolbar.
- To change the shutters on an image to masks, select Mask from the toolbar.
Save redactions
The redacted image (or images) will be saved as a new series in the original study unless you choose to save the series in a new anonymized study.
You can choose to apply the redactions to the current image or to all images in the series. You can also choose to remove the redacted images from the original series.
Note
If you do not want to save your changes, select Clear.
- Select Save from the toolbar.
- To remove the redacted images from the original series, select Delete original instances.
or
To keep a copy of the images in the original series, deselect Delete original instances. The images will remain in their original state in the original series. - To save the series in a new anonymized study, select Deidentify, then select a confidentiality profile (for details, see About anonymization). The anonymized study will only contain the series that has been redacted.
- Enter a Series Description and Series Number for the new series.
- To apply the redactions to the current image only, select Apply to image.
or
To apply the redactions to all images in the series, select Apply to series.
- Select Save.
Return to the QC viewer
To return to the QC viewer, select X in the top-right corner (beside the patient information).